
 For as long as I can remember my parents always made me write thank you cards whenever I got gifts – if someone’s bothered to buy and send you something the least you can do is say thank you. Although there were times it felt like a chore it something that I’ve continued to do (albeit maybe not as promptly as I used to), as its both good manners and in a time of emails and texts flying back and forth getting post is still a lovely thing.
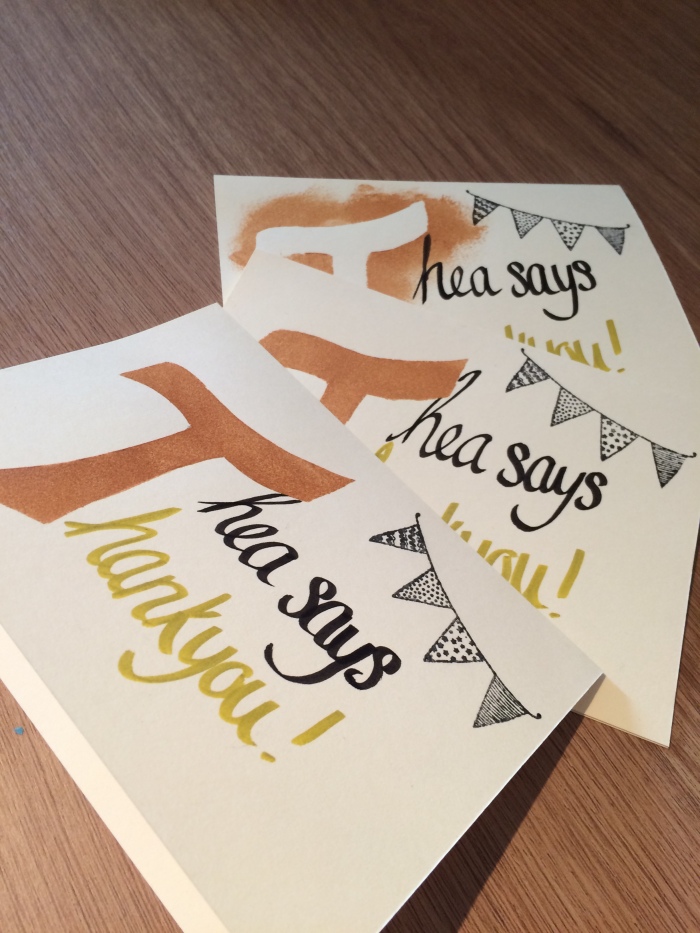
When we had Tigger we were overwhelmed by the generosity of people who sent us gifts for her, and her first birthday was no different. And despite her pen-womanship being a little below par that wasn’t going to mean my daughter was going to be rude. Now I’m well aware that I can’t do this for every event (and I didn’t at Christmas) but her first birthday was special and the presents were special so they deserved special thank you cards.
So Hello card/paper stash!!
Paper craft and cutting have always fascinated me, but I’ve never really done much. Not long before T’s birthday I did make a couple of cards for some good friends and so I thought I’d continue that. The big difference however was that both of those were one offs and I now needed a run of around 20. So I simplified the design, kept the range of colours and equipment to a minimum (within reason) and set to work!


It helps that the day I made them coincided with T’s first morning with the child-minder so I had 3.5hrs to myself. From start to finish, including writing and enveloping but not the drying time, these took me about 3 hours. I had also had a few cups of coffee and was super-charged to get as much done in my toddler-free time as possible.
I tried as much as possible to only use things from my craft stash. I already had the card, the gold acrylic paint and even the calligraphy pens which I’d bought with a different project in mind. The stamps I used were from Hobbycraft, and the ‘with love’ stamp on the back had been a gift to me along with the ink pads so fortunately I also had to buy the bunting as the cards needed something but going 3-D (SO wanted to add a mini pom-pom!) wasn’t really an option as they were for posting.
The T stencil was the only bit of paper-cutting I did, and I used it ‘both ways’ as I really liked the effect, and its good if you’ve got a few members of the same family who might compare cards (teeheehee). Using both parts of the stencil really sped up the process too and minimised the drying time. The stamping wasn’t that messy at all, but then again I’m not a toddler doing it (not that it always works that way!), and I liked that this way the imperfect and unique nature of the cards was preserved.


This was even more the case with my calligraphy. Although intended for another project (which I’ve not done yet!), this was a good opportunity to practice my calligraphy and boy does it need practice! My handwriting is naturally quite scruffy so this was a test not only of [relative] neatness but also consistency of letter sizes – it’s ALOT trickier than you think! The pens I used were Manuscript Callicreative Italic markers in Gold and Black. I practised with both the M and the XB sizes but the tip of the XB seemed very rigid so I used the Medium which seemed to suit my writing style better.
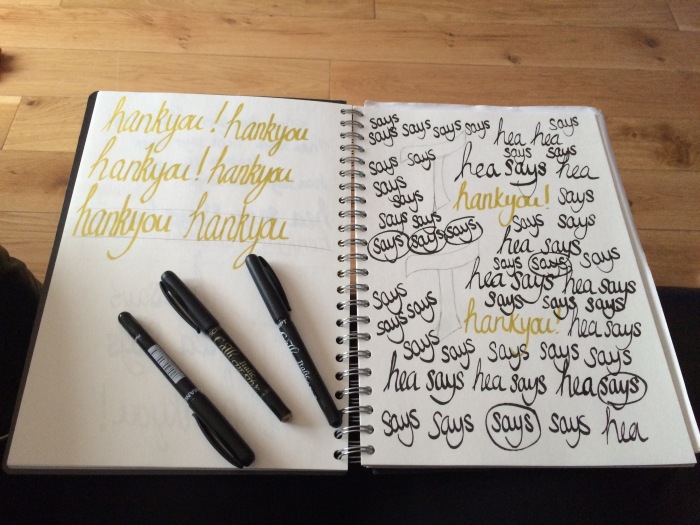
As a starting point I don’t think these aren’t too bad and certainly passable for handmade cards. After this I would love to do more calligraphy, and try brush lettering too, and fortunately I now have a book to help me better understand it all as the art form it is. I’m hoping I’ll improve with practise, but if I don’t I’m lucky enough to know a very skilled calligrapher, Merrie from Merrie and Bright (FYI You can find her on Instragram or visit her beautiful Etsy shop and I recommend you do both).
They might not be as refined as some handmade cards you can buy but nor are they as generic as your supermarket thank you’s – I’d absolutely suggest everyone has a go at what is such a quick craft (especially over a potentially soggy February weekend!).


PS – the first in this series was (shockingly) about 9 months ago – promise I’ll be better in future, got some plans up my long knitted sleeves!

They’re great! I’m also teaching my little ones to send a thank you note when given a gift. After Christmas, my eldest and I potato printed stars on some cards to send. I even managed to get him to write his name in some! Keeps the kids occupied and the relatives thinking they’re wonderful!
LikeLike